I've been going a bit crazy lately with my Cuttlebug. I've created quite a few Christmas cards using basic embossing as well as some ink resist.
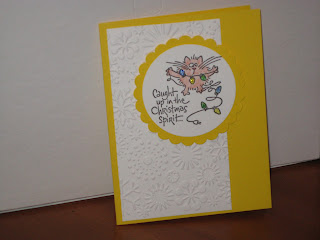
These first cards were done with plain white cardstock embossed with the snowflakes folder. I used a Fluffles stamp (so incredibly cute!) and my scallop circle punch for colour.

This next card is just an embossed circle with a cute penguin sticker I had laying around. Nothing fancy.

I love the way this card worked out. I simply embossed two pieces of white cardstock with the ornaments folder. I used one piece for the main card, and then cut a 2" square and matted it for the accent.

Next I decided to try something a bit more complicated. Here are the basic steps (although there are lots of other "how to's" on the internet) and two of the cards I created.
1. Using plain white cardstock, dab stamping ink all over card. Then smear a lighter colour of stamping ink onto the card to give a two-toned look. Keep dabbing and smearing until you are happy with the look.
2. Wait until the card is completely dry! This is absolutely essential.
3. Run the card through your cuttlebug using the embossing folder of your choice.
4. Use your brayer to add clear embossing ink to the raised areas of your card. Add preferred colour of embossing powder (shake off excess).
5. Use heat gun to emboss the raised areas.
6. Admire your final product!
The colours on this card didn't photograph well - they are much more red than pink in real life.