Tuesday, August 31, 2010

Nerdbot goes back to school

I made today's card using my newest purchase from Tiddly Inks - "Nerdbot" is so square as to be unresistable and he is just perfect for back to school.
This card has lots of layers, in paper and in meaning (lol). I chose to use black and grey to match the grey spirits of so many kids when faced with their return to school. The paper-pieced yellow flowers are to represent the happiness of the parents. And the googly eyes ... well, they represent that when I added Glossy Accent to the glasses, the ink ran slightly leaving the eyes looking blood-shot so I covered the boo-boo with googly eyes.

All of the images (including the fabulous blackboard) are from Tiddly Inks. I coloured Nerdbot in greys and then paper-pieced the flowers using some scrap paper. The great advantage to using digital stamps is shown here in that I cut the flower from the Nerdbot image and then re-sized them to create embellishments and sentiment. I used a Cuttlebug folder ("Robotz") to emboss the horizontal strip and a Tim Holtz folder ("Notebook") for the larger block.

So, that's it for today except to complain that I cannot believe that both my boys will be in school starting next week. Alex won't be turning 5 until December so I worry about him starting Kindergarten already but his daycare & preschool both think he is ready. And as his mother, I will never think he's ready (LOL). Luke is starting Grade 2 and acting (sometimes) like he is ready for High School.

Well, best of luck to all the kids and their forlorn/happy parents!

Challenges:
Tiddly Inks - back to school
Little Red Wagon - back to school
Simon Says Stamp - paper piecing
Stamp Something - back to school somethings
Incy Wincy - back to school
Simon Says Stamp - PCP - back to school
Fussy & Fancy - back to school
Papertake Weekly - just the one (I used only one colour - yellow)
Creative Card Crew - back to school
Create 4 Fun - sketch

Friday, August 27, 2010

Road trip to Calgary

Can't believe the summer is almost over, but at least we had a chance to go on a super vacation! This year we decided to stay somewhat local and do a good old-fashioned roadtrip through BC and into Alberta. The kids were remarkably good about all the driving but then we made sure to finish up each day with something fun:
  • 1st stop was Kamloops with its wonderful Riverside Park (swimming in the river, absolutely huge spray-park and a death-defying playground).
  • 2nd stop was Golden which was pretty dull but we had the hotel swimming pool & hot tub all to ourselves!
  • 3rd stop was Drumheller (or Dinosaur Central as the locals think of it) where we camped, visited the world's best dinosaur museum (the Royal Tyrrell) and explored the local Hoodoos (more on that when I get the scrapbook pages done).
  • 4th stop was Calgary, where we met my parents, my sister and her 2 girls for 2 days at the Calgary Zoo.
  • The final stop was Edmonton where we enjoyed the farm life at my sister's place
Today's layout if for the Calgary Zoo portion of the trip. This zoo is just fantastic! I took way too many pictures (what a surprise!) but managed to cut it down to a 3-page scrapbook layout.
I'm pretty proud of these pages because I came up with the layout design myself and I also put a lot of work into the first page header. The layout is pretty simple, using kraft paper as the background, with an orange scalloped paper used to provide continuity on the pages. All of the matting is done with cream and kraft cardstock as well as a monkey-themed green patterned paper.
The title and the 2 animals were cut with my Cricut (Animal Kingdom cartridge). I then ran the title through the Cuttlebug using a Zebra embossing folder from Sizzix. The animals were pieced together and then I used a dark brown marker to add some details. The other titles (the ones in cream paper) were cut using SCAL software and the Cricut. I outlined the words with brown ink to make them stand out. The final touch was all the tropical foliage which was stamped, coloured, then hand-cut (ouch!!!). The stamp is from Stampadoodle and is a real favourite of mine.
Page 2 is simple with just the addition of some cut-out monkeys from the patterned paper. I like how they seem to be crawling all over the picture of Gramma & Grampa with all the unruly grand-kids. I used the same orange scalloped paper to provide continuity over all 3 pages.
Page 3 has all of the journalling on it, as well as a few hand-cut leaves tucked in to tie the pages together. The journalling was done on my computer using Comic Sans font.

I hope to have more layouts from the holiday soon, just need my hands to recover from all the fussy cutting!

Challenges:
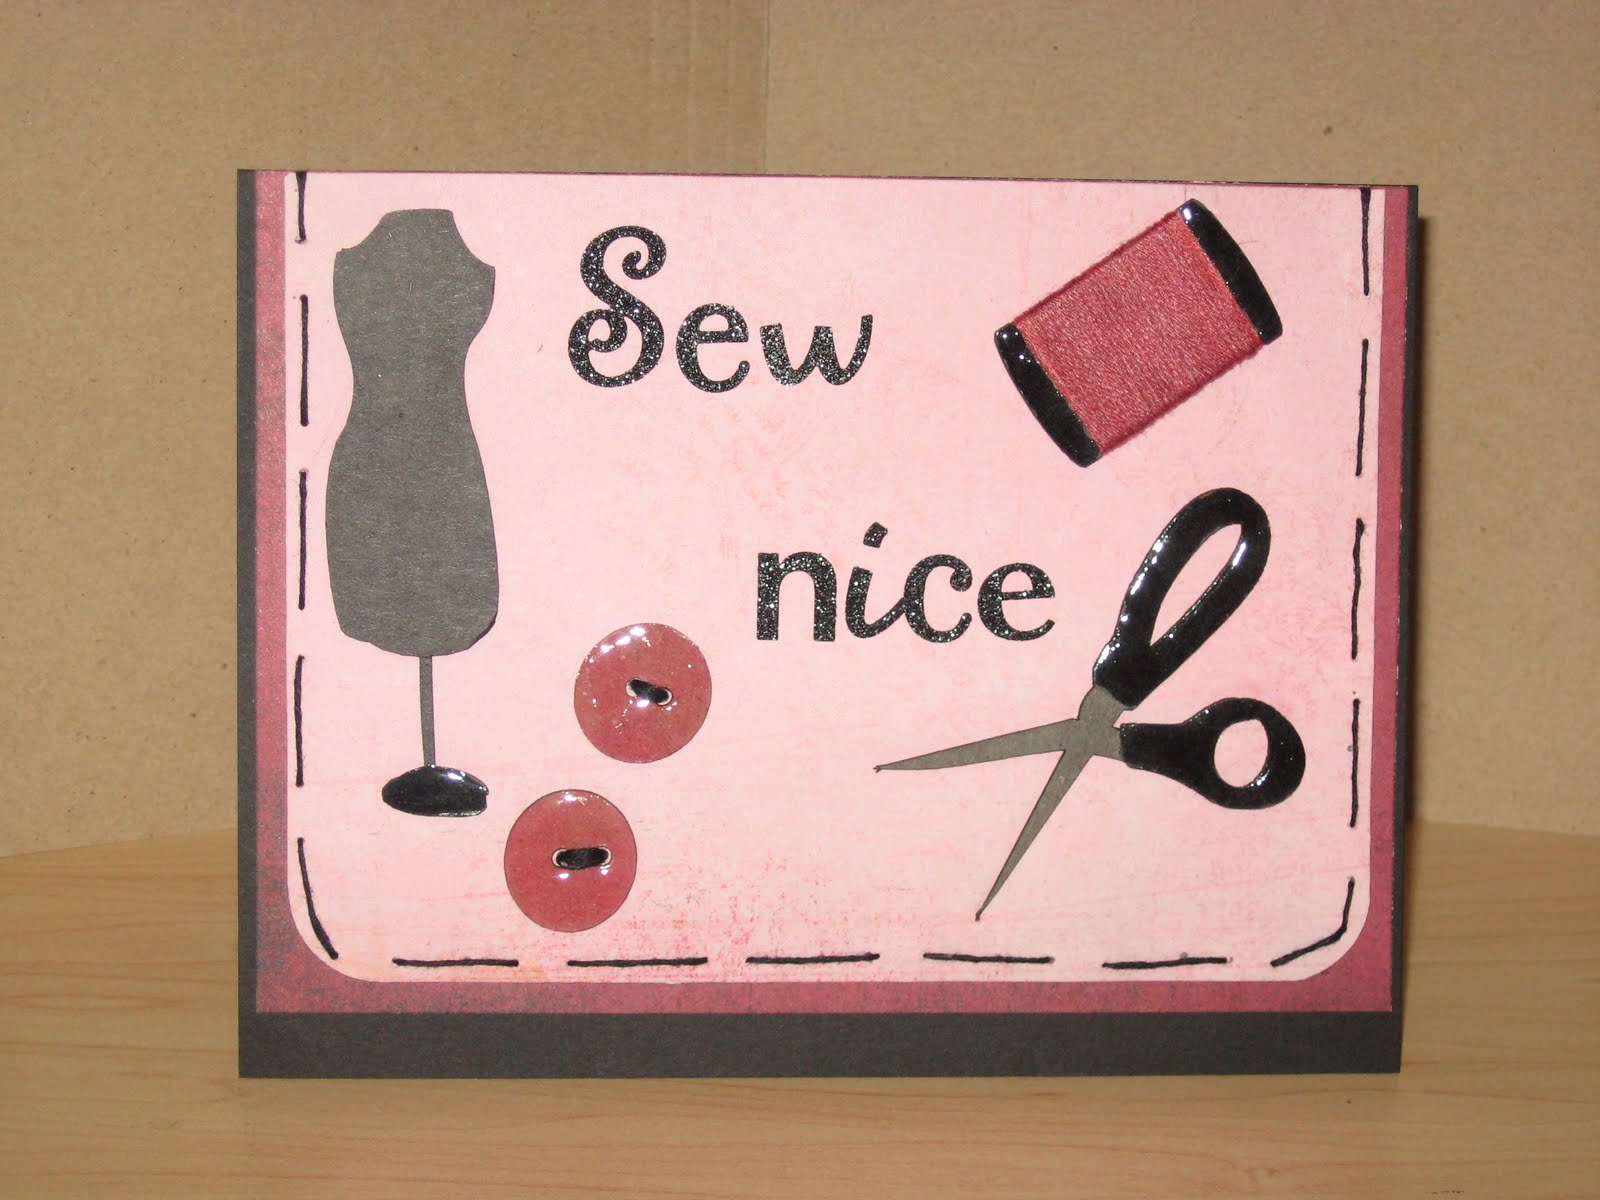
One Stop Craft Challenge - not a card
Stamp, Scrap & Doodle - use kraft
Papertake Weekly - 3-2-1; 3 pages, 2 journalling spots, 1 patterned paper
By the Cute & Girly - animal antics

Friday, August 20, 2010

Make your own sketch

Here is card #2 for The Stamping Boutique's month-long challenge. This week the challenge is to create a card from a sketch you create yourself. I decided to use the image that was provided free at the beginning of the challenge and then created a simple design that would really highlight it.

I chose really vibrant/strong colours when I coloured the image and I had a really hard time finding the right patterned paper until I came across this one ("Marabelle") in the new Basic Grey "Olivia" pack. I have most of the Basic Grey paper packs and I don't think I've ever failed to find the right paper in there! Instead of colouring the flowers on the image, I attached some small paper & felt flowers with added pearl centres.

In addition to the Basic Grey PP, I also used a sheet of Core'dinations "Black Magic" card. I sanded the edges to bring out the purple core, thereby creating a small frame. The final touch was the ribbon and larger pearls (because cards always need some shine, in my opinion).

Challenges:
Basic Grey Challenges - pearls
Stamp Something - stamp something digi
The Stamping Boutique - create a card using your own sketch

No icky stuff on this card

Last night I got to create one of my favourite types of cards - a birthday card for a little girl. As the mother of two boys, I get really tired of gross & icky stuff so it was such fun to make a pretty, pink, girly card.
This card uses a Sarah Kay image along with a bunch of free papers from a crafting magazine. I coloured the image months ago and always planned to use it for Leila's birthday card. The sweetness and gentleness of this girl reminds me so much of Leila. With the exception of the small pearls along the side, all of the papers & embellishments are part of a set that I received free inside a crafting magazine. After cutting out the embellishments, I rounded the edges by placing the cut out image upside down in my hand and then running an embossing tool around the edges. This gives the illusion of depth & mass and makes the embellishments look more realistic. This is a new "technique" that I've been practicing with - I hope it succeeds (lol).

Challenges:
Cute Card Thursday - sketch
Corrosive Challenge - use a "faux" technique; this card uses lots of faux stitching as well as digital embellishments (like ribbon)
Pile it on - use more than 5 cut-out elements; the ribbons, flower, leaves, heart
Pollycraft Monday - in stitches
Everybody Art - in the garden
Fab 'n Funky - flower power
Paper Play - lots of pink
Crafts and Me - petals & pearls
Stamping for the Weekend - anything goes

Tuesday, August 17, 2010

A quick hello

Just a quick card today. This is an almost exact scrap-lift of a card in the current issue of Paper Crafts Magazine. I just love how simple, yet interesting, the card is and when I saw the design I just had to duplicate it for a friend.
I started my scoring 1/2" squares using my brand-new Scor-Buddy. I then added the floral flourish along the top using a Cuttlebug border folder. I added some pearls and a paper flower for some bling. The sentiment is made with felt letters that are adhered using the xyron. Once done it looked a bit flat so I added some distress ink around the edges and over the front. As I said, a quick card but I think I'll use it right away for a note to a friend as it is just so pretty.

Challenges:
Cooking it up with Katie - squares, flowers and a touch of pink
Craftalicious - swirls & pearls

CDAC Digital Table Giveaway

There is an amazing blog candy giveaway happening at CDAC right now. If you aren't already a member of CDAC, this is a great excuse to join now.

One CDAC member will win this Drawing tablet.  You can learn to draw your own digis with this prize. This brand new tablet is ergonomically designed for drawing, handwriting, sketching, coloring, or picture editing, and powered directly by the USB connection. It’s not only a fantastic media tool for designers, but a "hand-eye" coordination, fun input device for a computer. Giveaway ends Sept 13th and winner will be picked by random generator.


Would you like to win this? Go to CDAC to find out how.
***Giveaway entry is from Aug 11th through Sept 13th (midnight PST)***

Monday, August 16, 2010

It was a kick

It was a busy weekend for card-making. The weather here is stinking hot so I couldn't spend as much time outside as I wanted. Instead I finished up several cards that have been sitting on my workspace. Here is a card that I made for a new friend that I mentioned in an earlier blog posting. Kathy has an engraving business and is just expanding into paper-crafting items (chipboard embellishments mainly). I made this card using one of her die-cut shapes.
I coloured the boot using a couple of different shades of grey and then laced some ribbon through. I had a terrible time coming up with the design for the card as I loved the boot but didn't want the card to end up too masculine in tone (after all, this is for a femal). I ended up using a sketch from Midnight Madness when I realized that the boot was actually a triangle shape. I just love using sketches because this card came together quickly once I had the right sketch in front of me.
The back triangle is a floral paper matted on kraft cardstock. I embossed the red paper strip using one of the new Tim Holtz embossing folders (this one is wood grain) and then added a red flower that I created from some foil and a felt flower. The flower looks kind of crappy in the picture but it actually works well on the "real" card.

Peek-a-boo Tag Card

This is a quick, fun little card that I thought would be suitable for a baby boy. The image is currently offered free at CDAC (in colour challenge #4).

I've been wanting to make a pocket card for awhile now so here is my attempt. The tag slides into the pocket but I've photographed it on top so you can see the tag in its entirety. I used 12x12 brown cardstock as the base and then added Basic Grey patterned papers on the inside and the right hand flap. I kept the tag design very simple with just a strip of the same PP that I used for the card inside. I found this little peek-a-boo metal charm and decided it was the perfect embellishment/sentiment. The ribbons are white ribbons that I coloured with Copic marker E000 to make off-white.

Challenges:
Crafty Creations - winged things
Crafty Catz - animals
Just Us Girls - wild, wild west
CDAC Colour Challenge - red, chocolate, and off-white
Dare U 2 Digi Stamp - blooms & charms (flowers on the PP and a metal charm as sentiment)
By the Cute & Girly - animal antics

Stamping Boutique 1st Monthly Challenge

The Stamping Boutique has started a monthy challenge on their PCP group where you get a free image every week that you participate. Well, I just love freebies and will take any excuse to make a card so here is my first week's card (the challenge was to use a Stamping Boutique image and kraft). 
The image is Stamping Boutique coloured wth Copic markers. The patterned paper is Basic Grey and the purple is Cored'inations embossed with a Cuttlebug folder. The flowers were made using a couple of Crafty Ann's digital images (currently offered as freebies on CDAC) that I coloured, cut out and layered. Everything was distressed with brown ink.

Challenges:
My Time to Craft - farm fever
Fab 'n Funky - use your favourite colours (which are purple and blue for me)
Simon Says Stamps - summertime blues
Off the Wall Craftiness - blue, white & purple (I used the colours although the tone of my card is very rustic)
MAWTT - sketch

Tuesday, August 10, 2010

Dino-mite Birthday

One of Luke's friends has a birthday coming up so I decided to make a boy's birthday card last night.

I used a digital stamp from Stamping Dragon Designs (currently available as a freebie on Crafters Digital Art Center (CDAC) as part of this month's challenge). And by the way, if you aren't a member at CDAC yet, join and start using all those wonderful digis!

Since the card is for a boy I wanted a nice earthy feel and so decided to use the colour palette from Play Date Cafe's colour challenge. The sentiment is computer generated with an eyelet put through the "o" for a bit of interest. I'm quite proud of the 3 circle embellies as those were saved from some packaging months ago - I just knew they would come in handy some day!

When the card was finished it still seemed too plain so I added a couple of fabric maple leaves behind the dinosaur. I think it makes for a more interesting background and kind of reminds me of wings.

Challenges:
Play Date Cafe - colour challenge
CDAC Other Theme Challenge - 1 image, 2 design papers, 3 embellishments
Creative Inspirations - recycle an element on your card
Challenge Up Your Life - celebrations

Monday, August 9, 2010

Sew nice

One of the highlights of last week's visit with Mom was a trip out to see her friend Kathy. Kathy has started an engraving business (http://www.engravit.net/) and is expanding into the scrapbook/paper crafting market. She has already created some wonderful laser-cut die sets (including the sewing set that I used for my card) and is exploring other products. I talked her ear off with suggestions about other chipboard products she should consider producing (things like albums, alphabets, storage solutions). And at the end of our visit she presented me with an entire box of chipboard shapes!!! It was physically painful having to wait until I got home this past weekend to use any of them but I managed to survive the ordeal.

My first project using Kathy's dies is this thank you card for my Mom. I used several pieces from the sewing set (buttons, spool, scissors, dressform) along with some glittery alpha stickers.


Here is a close-up of tthe spool as I'm quite pleased with how it worked out. I coloured the top & bottom of the spool with Copic C09 and then added Glossy Accent to give the impression of a raised lip. Next I coloured white cross-stitch floss with Copic R83 to match the background paper and then wound the floss around the spool. I really think it looks "real".

The scissors are also coloured (C03 for the blades, C09 for the handle) with Glossy Accents added to the handle. The buttons are coloured with R83 with Glossy Accents over top and they are sewn onto the paper. As a finishing touch I added stitching to the edge of the card.
Challenges:
Fussy & Fancy Challenge - pink & black
Stamp, Scrap & Doodle - don't use any images, just die cuts, sentiments
Sentimental Sundays - anything goes

Sunday, August 8, 2010

The end of vacation

I had a wonderful 2 weeks off - lots of driving, visiting and touring. There will be plenty of scrapbook pages coming if I ever get the chance to sort through the hundred + photos I took. But first things first, I have to make a few thank you cards.

The first card I've finished is for the friend who took care of our cats. She is a cat lover so I decided to make up this card for her.
The card is actually a re-do of one I made ages ago but wasn't totally happy with. I love the image (from Karen's Doodles) and the brown/pink papers (from Basic Grey "Bittersweet" collection), but I wasn't happy with the way the card was finished. I ended up changing the embellishments - adding the 3 brown/pink flowers with jewelled brad inserts, the brown scroll line and adding the sentiment. You can't see well in the photo but there are Stickles and Glossy Accents added to the crown, the pattern on the chaise, and the heart tag.

Challenges:
Karen's Doodles - Anything goes
Creative Card Crew - Cute & girly